
Ceramic Molds? What is that?
After watching and obsessing over Shelby Sherritt and her Mystery Mould series on YouTube and Instagram; I decided it was time for me to join in the fun.
During a recent trip to Asheville, where my husband and I celebrated our 20th wedding anniversary (yay us!); we stopped at a lady's house to peruse her collection of molds for sale. I had found a listing via FB marketplace and thought it would be a great opportunity to get my feet wet with a new ceramics technique. I spent a good hour rummaging through her collection and came home with some amazing treasures. I focused on finding things I am still not capable of throwing on the potter's wheel and some sculptural things I do not have the hand dexterity for.
Before I show you some of the things I made, I think it would be best if I explained what a ceramic mold is and how the process works. Don't you think?
A ceramic mold is typically made out of plaster and divided into 2 or more parts; which helps facilitate the removal of the piece once it is cast. Most of the molds I am using are commercial molds; but there are some folks out there that make their own molds. I am still too early on my mold journey to explore the making of my own molds (to be honest, I am not sure I will ever get there, but never say never, right?).
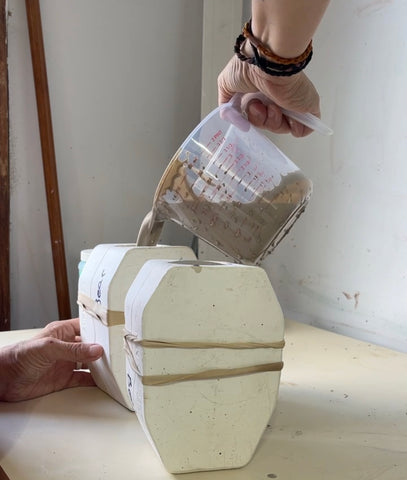
Liquid clay (slip) is poured into the mold, filling it all the way up. Depending on the mold and the type of piece that is being cast, the slip stays in the mold for a specific amount of time; which determines how thick the piece will be. The plaster the mold is made out of is a porous surface and it absorbs the moisture from the slip.

Once the slip sits in the mold for the desired time, the excess slip is poured out. After the excess slip is poured out it leaves behind a layer of clay adhered to the mold's surface. The thickness of this layer depends on factors such as the duration the slip remains in the mold. At this point, the piece is cast and will remain in the mold to dry some more. As more moisture is absorbed into the mold, the piece starts to shrink and slowly releases from the mold walls.

Once the piece has slowly dried and has solidified some, the mold is carefully opened, and the piece is removed. At this point, the piece is still relatively fragile and may require further drying before additional handling.

After the piece is taken out of the mold any seams or imperfections on the ceramic piece are carefully trimmed and smoothed.

Once the seams are smoothed out; the piece is ready to slowly dry and go through both firing processes.

I can't begin to tell you how much fun I have been having with this. The learning curve is steep and, like with all the things ceramics, patience is a virtue you need to be ready to develop... there were som many attempts where I tried to open the mold too early and that resulted in a torn piece. But, the results can be quite spectacular.
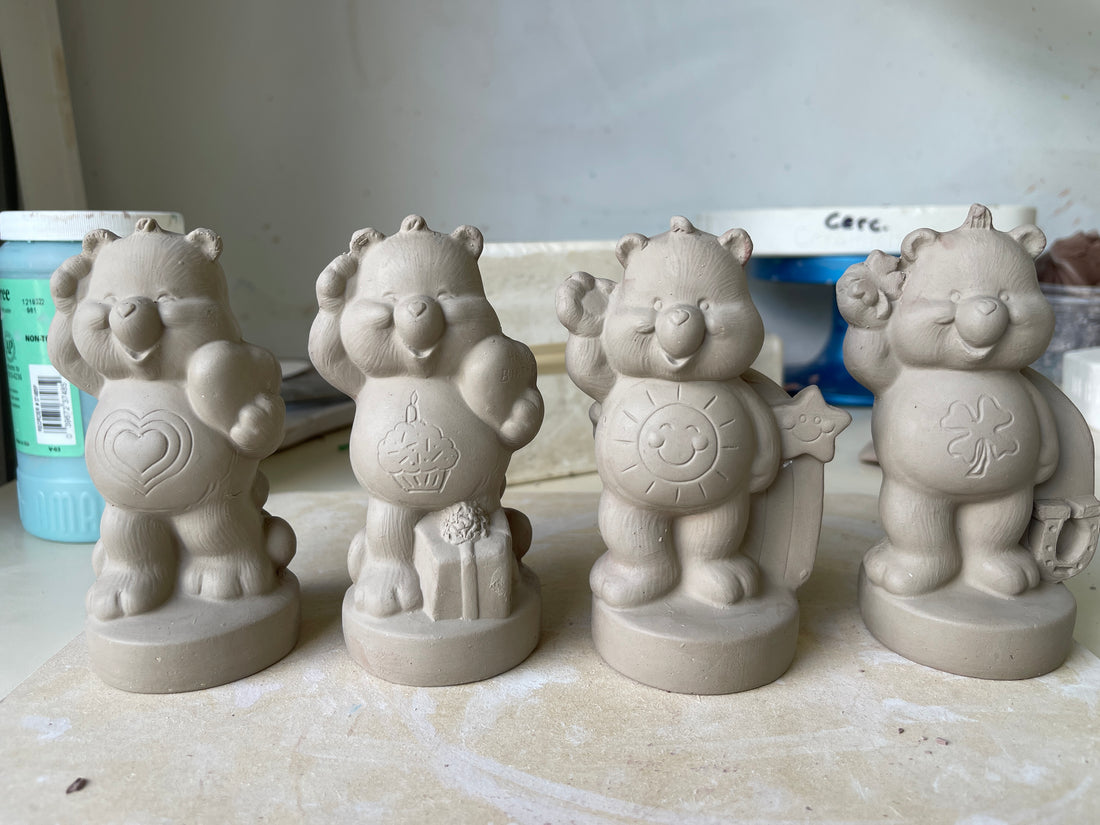
I made a small collection of care bears, have some lidded jars in the works, a batch of Christmas ornaments well on its way for holiday markets and countless other fun shapes.
If you could request a specific shape from me, what would it be? Drop down in the comments and let me know!